Utilize Format Painter Tab To Copy Formatting Of Content In Word 2016
Introduction
Format Painter Tab Is Utilized To Apply The Same Formatting Or Changes That we have did on some content or Graphic present in the document. It can be applied to pictures , text, images etc. whatever content is present in the document.
Follow Steps Below To Enhance This Task
- First select the formatted text or graphic whose formatting we wish to copy.

- Then click on home tab And Go To Clipboard there.
- Now Click On Format Painter.

- Select the text or graphic whom you wish to be formatted.

- As soon you are done. Click escape to end formatting.
- That is it.
For More Assistance regarding this please visit: www.office.com/setup
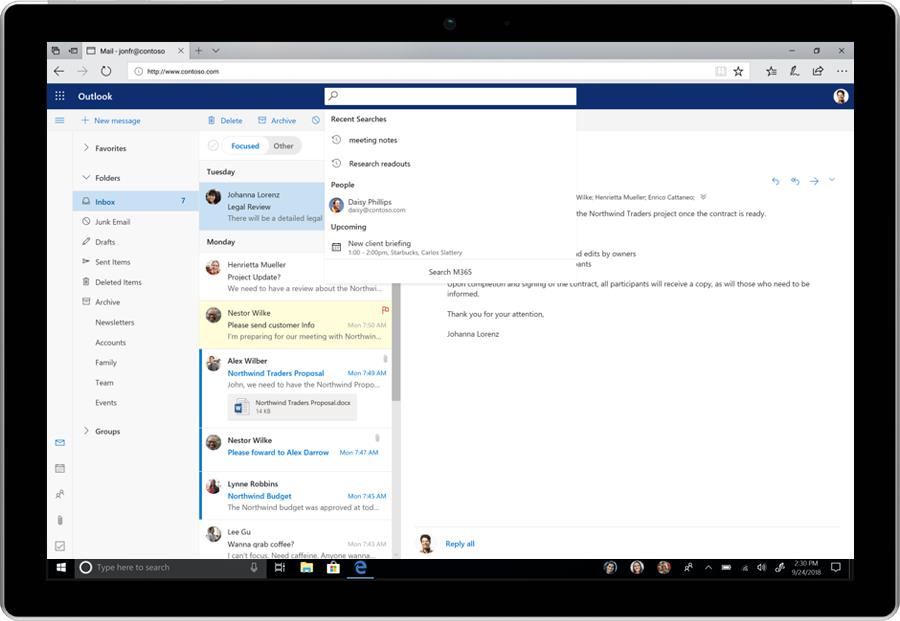
Office 365 is getting fluent design, simplified ribbon, other design changes
www.office.com/setup Blogs - Microsoft today highlighted some upcoming changes for the Office 365 user interface.
www.office.com/setup Blogs - The changes are inspired by a “new culture of work” and will bring fluent design, a simplified ribbon, and search enhancements to the Office 365 experience. Gradually rolling out over the next few months, users should first expect to see enhancements to Word, Excel, PowerPoint, and Outlook. The updates will be exclusive to on Office.com and Office 365 and won’t happen all at once, but instead tested in stages.
With the improvements to the Office Ribbon, users can expect a focus on working and collaborating with others in a more natural way. There’s now going to be a more “compact” view for the ribbon, with a collaboration view in the top right corner. Users can also still expand the ribbon back to the classic three-line view if they see the need.
The improved Office ribbon will only roll out to Office.com starting today, with Insiders seeing it in Outlook for Windows starting in July. Microsoft says does not want to bring the new ribbon to Word, Excel, or Powerpoint physical apps just yet, as it doesn’t want to make changes to disrupt the workflow in these apps.
Next up, with the new colors and designs, users can expect to see Fluent-Design inspired changes across the Office web apps. There will be new colors, icons, and new animations and reveal effects in ribbons. These will first appear in in the web version of Word for Office.com, and then roll out in later this month to the Insider versions of Word, Excel, and PowerPoint for Windows. Microsoft is also planning on rolling it out to Outlook for Windows in July, and Outlook for Mac in August.
Finally, is an enhanced search feature for Office 365 on the web. Microsoft is now making it so the search functionality can provide access to commands, content, and people. Users should also expect a “zero query search” when hovering over the search box, powered by AI and the Microsoft Graph. This feature is already available for commercial users in Office.com, SharePoint Online, and the Outlook mobile. Microsoft plans to roll it out to commercial users of Outlook on the web in August.
According to Jared Spataro, Corporate Vice President for Office and Windows Marketing, these latest changes are based on three guiding principles— customers, context, and control. Microsoft will monitor the usage of these new features and will listen to feedback from users. The company will update designs as more feedback comes in, so best to try it out and help build the future of Office 365!
Tweak The Excel Launches To Dimnish Startup Assignments
Tweaking Excel's condition is one approach to work all the more effectively. Additionally modifying Excel by controlling the way it opens can likewise diminish tedious undertakings, in this way expanding profitability. There are a couple of simple changes your clients may profit by when propelling Excel:
- Open a particular exercise manual
- Open with no exercise manual
- Open with a custom layout
Open a particular exercise manual
Clients who work with only one exercise manual can spare a couple of keystrokes if Excel opens that exercise manual when propelling. To do as such, essentially store the exercise manual in the XLStart organizer, which you'll presumably discover in the accompanying index:
- Windows XP: C:\Documents and Settings\user name\Application Data\Microsoft\Excel\XLStart
- Windows Vista: C:\Users\user name\AppData\Local\Microsoft\Excel\XLStart
- Windows 7: C:\Program Files\Microsoft Office\Office
Spare the exercise manual as you would some other, yet determine the XLStart organizer in the Save In charge. When you do, Excel will constantly open that exercise manual, rather than a clear exercise manual, when propelling.
Open with no note pad
This is an odd demand, yet at the same time, a few clients incline toward not to open any exercise manual, even another clear one, when propelling Excel. There's no worked in setting to empower this conduct, however you can make an alternate route symbol and utilize a switch, as takes after:
- Utilizing Windows Explorer, discover Excel.exe in the Microsoft Office subfolder (C:\Program Files\Microsoft Office\Office).
- Right-click Excel.exe and select Create Shortcut. Exceed expectations will make another alternate way symbol, which you'll discover at the base of the rundown of records in the present organizer.
- Right-tap the easy route symbol and pick Properties.
- Tap the Shortcut tab.
- Snap in the Target field and include a space, trailed by the/e change to the present way.
- Snap OK.

Probably, you'll need to move the alternate route symbol to the client's Desktop. You can do as such by right-tapping the symbol and picking Send To, and after that choosing Desktop. You should prepare your clients to utilize this alternate way symbol to dispatch Excel with no exercise manual - that is the one disadvantage to this straightforward method.
Open with a custom format
A custom layout is an awesome method to decrease designing assignments and to apply your association's traditions. To spare an exercise manual as the default layout, make the exercise manual, setting all the suitable properties and choices. At that point, spare the exercise manual as you typically would, yet pick Excel Template (.xltx) from the Save In dropdown. Name the exercise manual Book, and spare the exercise manual to the XLStart organizer; don't spare it to the default Template envelope as you would different layouts.

Blogs : www.office.com/setup
Quick Trick To Type Text In A Scanned Document In Microsoft Word
Paper frames aren't outdated, not using any and all means. In any case, in the event that you need to utilize Word to fill them in, you can. A snappy and simple trap renders most paper frames into an electronic document. It is anything but an impeccable arrangement, yet it'll work after all other options have been exhausted.
To begin with, filter the shape and spare it as an illustrations document. You're without anyone else with that progression as frameworks are one of a kind in their directions. Make sure to spare the examined shape in an organization that Word can utilize, for example, jpg, png, or bmp. (There are some more.)
When you have the checked report record, embed it as a photo as takes after:
- In a clear record, open the header area. In Word 2007 and 2010, simply double tap in the best edge territory. In Word 2003, pick Header and Footer from the View menu.
- With the header segment open, tap the Insert tab. At that point, click Picture in the Illustrations gathering. In Word 2003, pick Picture from the Insert menu, and after that look over File. Peruse to the record and double tap it or select it and snap Insert.
- With the photo record chose, pick Behind Text from the Text Wrap dropdown in the Arrange amass on the relevant Format tab. In Word 2003, right-tap the photo, and pick Format Picture. Tap the Layout tab, pick Behind Text, and snap OK.
- Close the header segment. Try not to stress if the realistic darken a bit.

With the realistic in the header's experience, you would now be able to type as you ordinarily would, utilizing the realistic as your rule. There are no extraordinary controls or tabs to position the cursor for you. You can absolutely go that course, yet that takes a great deal of work, and except if you will reuse the shape a considerable measure, it's most likely not worth the exertion.
No doubt, the frame won't adjust perfectly the first occasion when you attempt. Essentially open the header and change the situation of the shape as required. You can likewise change the textual style, text dimension, and tab stops to oblige the shape's fill-in positions.

Blogs : office.com/setup
Rapidly Erase Entire Paragarphs Via Relying Styles In Word 2003
Erase Entire Paragarphs
Keeping up an extensive report can take a great deal of work. For example, in the event that you needed to erase a few sections, you'd likely do as such outwardly, one by one. Then again, if the sections you have to erase are utilizing an exceptional style, you can utilize Word's Find and Replace highlight to erase them at the same time.
How about we take a gander at a speedy illustration. The accompanying record utilizes the implicit style Subtle Emphasis for the starting passages in each new segment. Every single other passage utilize Normal. You can just observe one page of the record, yet it could have many basic passages.

To erase the starting passages utilizing styles, do the accompanying:
- Tap the Home tab and after that snap Replace in the Editing gathering. In Word 2003, pick Replace from the Edit menu. Or on the other hand, press [Ctrl]+H.
- Snap More, if fundamental.
- Snap inside the Find What control. Erase the section, if there's anything there.
- From the Format dropdown, pick Style.
- In the subsequent exchange, discover the style. For this situation, that is Subtle Emphasis, and snap OK.
- In the event that there's anything in the Replace With control, erase it.
- Snap Replace All.
- Snap Yes and afterward OK.


Word erased the greater part of the basic passages.

Word will erase all occurrences of this style, so be watchful when utilizing this system. In the event that you connected this style to different segments, for example, inscriptions, this strategy will likewise erase your subtitles! At the point when that is the situation, use Next and Replace to survey every event and choose exclusively, rather than utilizing Replace All.
Blogs : install office
Let's Discuss How To Apply Transitions To Powerpoint Presentations
Introduction
On the off chance that you've at any point seen a PowerPoint introduction that had embellishments between each slide, you've seen slide changes. A progress can be as basic as blurring to the following slide or as gaudy as an eye-getting impact. PowerPoint makes it simple to apply changes to a few or the greater part of your slides, giving your introduction a cleaned, proficient look.


 Have a go at applying a couple of various kinds of advances to different slides in your introduction. You may locate that a few changes work superior to anything others, contingent upon the substance of your slides.

 Blogs : office.com/setup
About Transitions
There are three classifications of one of a kind changes to browse, which can all be found on the Transitions tab:- Unobtrusive: These are the most fundamental kinds of changes. They utilize basic activitys to move between slides.
- Energizing: These utilization more intricate movements to progress between slides. While they're more outwardly intriguing than Subtle advances, including an excessive number of can influence your introduction to look less expert. In any case, when utilized as a part of balance they can include a decent touch between essential slides.
- Dynamic Content: If you're changing between two slides that utilization comparative slide designs, dynamic advances will move just the placeholders, not simply the slides. At the point when utilized effectively, dynamic advances can help bring together your slides and include a further level of clean to your introduction.
To apply a change:
- Select the coveted slide from the Slide Navigation sheet. This is the slide that will show up after the change.
- Tap the Transitions tab, at that point find the Transition to This Slide gathering. As a matter of course, None is connected to each slide.
- Tap the More drop-down bolt to show all changes.
- Snap a change to apply it to the chose slide. This will naturally see the progress.
- You can utilize the Apply To All charge in the Timing gathering to apply a similar change to all slides in your introduction. Remember that this will change some other advances you've connected.
Have a go at applying a couple of various kinds of advances to different slides in your introduction. You may locate that a few changes work superior to anything others, contingent upon the substance of your slides.
To review a Presentation:
You can review the progress for a chose slide whenever utilizing both of these two strategies:- Tap the Preview order on the Transitions tab.
- Tap the Play Animations order in the Slide Navigation sheet.
Blogs : office.com/setup
Know How To Insert Offline/online Pictures To Powerpoint Presentations
Insert Offline/online Pictures
Insert Offline/online Pictures can make your presentations more interesting and engaging. You can insert a picture from a file on your computer onto any slide. PowerPoint even includes tools for finding online pictures and adding screenshots to your presentation.
To insert a picture from a file:
- Select the Insert tab, then click the Pictures command in the Images group.
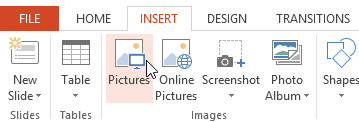
- A dialog box will appear. Locate and select the desired image file, then click Insert.
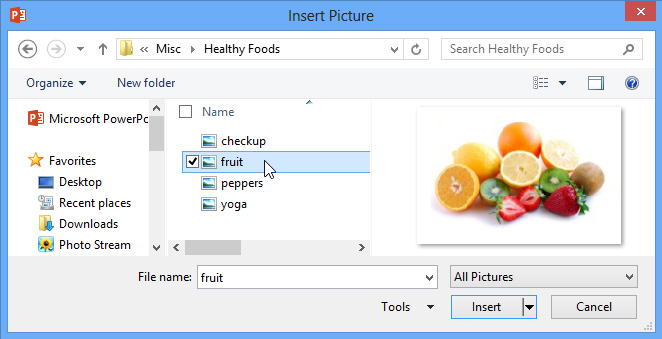
- The picture will appear on the currently selected slide.

You can also click the Pictures command in a placeholder to insert images.
Inserting online pictures
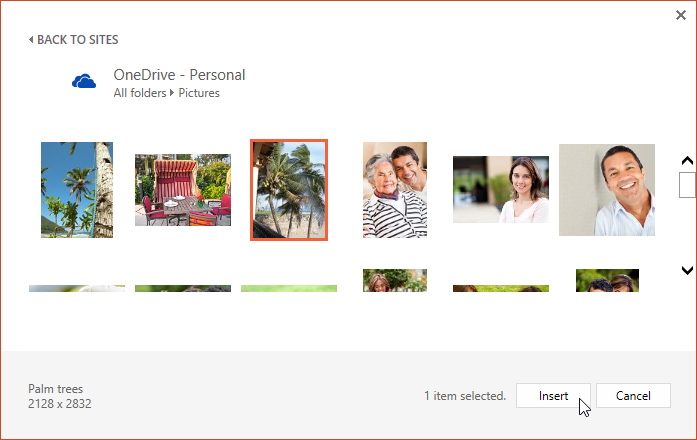
If you don't have the picture you want on your computer, you can find a picture online to add to your presentation. PowerPoint offers two options for finding online pictures:
OneDrive: You can insert an image stored on your OneDrive (previously called SkyDrive). You can also link other online accounts with your Microsoft account, such as Facebook or Flickr.Screenshot of PowerPoint 2013
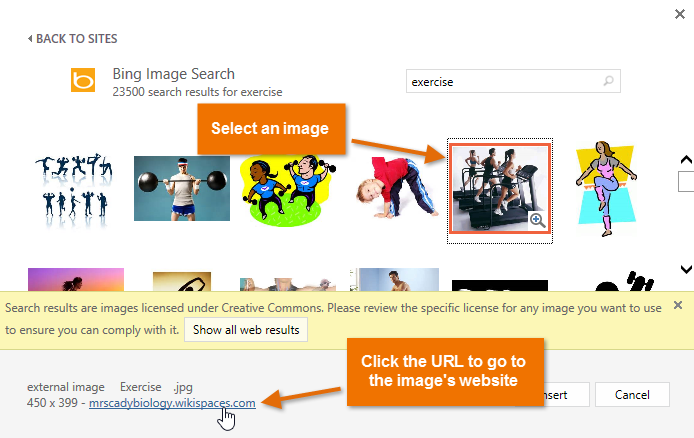
Bing Image Search: You can use this option to search the Internet for images. By default, Bing only shows images that are licensed under Creative Commons, which means you can use them for your own projects. However, you should go to the image's website to see if there are any restrictions on how it can be used.
Previously, you also had the option to insert clip art images from Office.com, but this service has been discontinued. Instead, you can use Bing Image Search to find images for your presentation.
Blogs : office setup