Presenting the Sensor Explorer App
SensorExplorer is an application accessible on the Microsoft Store (https://aka.ms/sensorexplorer) and the application bundle can be gotten to through GitHub (https://aka.ms/sensorstrace). The application offers tests that enable you to rapidly confirm the establishment of bolstered sensors, for example, introduction sensors (accelerometer, basic introduction sensors, and so on.), and point by point tables and plots that empower you to screen distinctive sensors. Moreover, logs can be advantageously spared later to debug.
There are three modes (menu bar on the left-hand side) in SensorExplorer:
Test: This mode is utilized for manual testing of upheld sensors. The case underneath features a brisk test to confirm introduction sensors are introduced in the right position and the sensor information is not surprisingly. The sensor information is perused utilizing the UWP Sensors API (Windows.Devices.Sensors: https://docs.microsoft.com/en-us/uwp/programming interface/Windows.Devices.Sensors).
View: This mode is utilized for survey sensor information. In this mode, the application shows an information representation from an assortment of sensors, (for example, accelerometer, compass, gyrometer, inclinometer, light sensor, and introduction sensor, and so on.). It can enable you to screen the irregular practices of the sensors.
Stock: This mode is utilized for observing sensor properties, information and occasions. In this mode, the application shows the nitty gritty sensor data in forbidden configuration. You may look over a rundown of accessible sensors. You can likewise utilize this mode to set the report interim of sensors.

Ventures to test your sensors
- Before you start the tests
- Under the test mode, in the event that you find that the show pivots when you turn your gadget, please kill auto-revolution on your gadget (Search "Pivot Lock" in Settings and turn it on). Else, you don't have to kill auto-pivot.
- It would be ideal if you allude to the Device Reference Frame segment found in the whitepaper at https://msdn.microsoft.com/en-us/library/windows/equipment/dn642102(v=vs.85).aspx) for more data on introduction and reference outline.
- Select the kind of sensor you need to test from the dropdown menu.

Tap the "Invigorate" catch.
In the event that the sensor is identified as accessible, at that point you are prepared to start the test.
On the off chance that the sensor is identified as not accessible, you can either hit invigorate or select another sort of sensor to test.
- Amid the tests
Tap the "Begin" catch to start the tests.
For each test, you have 10 seconds to arrange your gadget with the goal that the bolt on the screen is indicating down the ground.
Note:
(1).You may tap the symbol (featured in the screen shot underneath as a red box) to conceal the menu bar amid the test.
(2). The menu bar is incapacitated amid the test and will be empowered once the test wraps up.
(3). For the Simple Orientation Sensor, the four bearings tried are look up, look down, left, and right. For every single other sensor, the four headings tried are up, down, left and right.

- Once the sensor information mirrors that your gadget is in reality in the coveted introduction, a green checkmark will be shown. Furthermore, you will naturally proceed onward to the following test.

- Otherwise, after 10 sec, a red x will be displayed as this round of tests has failed.

- After the tests
Tap the "End" catch to end the application and spare the log (information for all rounds of tests will be spared in the log).
Or then again tap the "Restart" catch to begin another round of tests.
The most effective method to screen your sensors
Both the View and Inventory modes will naturally distinguish any sensors that are appended to or implanted in your stage. It will then show the data that it peruses from the sensors.
- View
You may look over the best menu bar (featured in the screen shot underneath as a red box) to change the sensor being shown.
For every sensor, the present information is appeared in a table and plotted as moving waveforms.

2. Stock
You may choose from a rundown (featured in the screen shot beneath as a red box) of accessible sensors to be shown.
This mode shows a sensor's more point by point properties, information and occasions.
The report interim of a particular sensor can be changed here.
Logs can be spared.

More on Logging
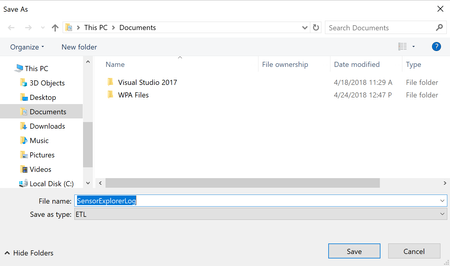
When you tap the "Spare Log" catch, you may pick the area to spare the log record. The default name of the ETL (Event Trace Log) record is "SensorExplorerLog", yet you may transform it.
To see the ETL document, you may utilize the tracerpt summon
- Test
The accompanying will be logged:
Properties of the chose sensor
Data about each test
The sensor perusing when you breeze through a test
The last sensor perusing before the commencement closes, for the situation you come up short the test
- Stock
The accompanying will be logged:
Properties of all chose sensor(s)
Each time the at present chosen sensor's perusing changes
Each time the at present chosen sensor's report interim changes
Future Work
A portion of the functionalities that we are wanting to add to SensorExplorer include:
Incorporate MALT (Microsoft Ambient Light Tool)
Different sorts of sensor tests
Enhance logging framework
Blog: Office Setup Help